
This is Part 2 of the series “Merry Microservices”
The source can be found on github at https://github.com/sdoxsee/merry-microservices/tree/part2.


Table of Contents
- Preamble
- Generate the project
- Add Reactrstrap dependencies
- Convert CRUD app to TypeScript
- Convert look and feel with Reactstrap
- Authentication and Security
- Proxy configuration
- Start keycloak
- Set up our server-side routes
- Ajaxify front-end CRUD
- Relay API calls to resource servers
- Start the gateway in development mode
- Get ready for production
- Configure maven plugins
- Add index.html to “/” mapping
- Done!
- Conclusion
Preamble
There are different opinions on whether or not to keep the UI separate from the backend API.
I write a lot of Java API + JavaScript App tutorials. If you’ve read them, thanks!
— Matt Raible (@mraible) August 22, 2018
I’m curious to know which deployment model you prefer. Results may influence future tutorials/talks. 😉
Do you prefer:
At face value, it looks like people like them to be separated. However, I think the question needs more unpacking (Dave Syer does a great job of discussing this).
My take on that poll is that people don’t want to restart their backend to see changes in their UI code. I 100% agree with that. However, you can still have that developer experience and serve up the UI along with a backend of some sort. In the case of a monolith, your full backend API would be part of your bundle. In the case of a microservice gateway, you can still serve up your application with a thin server-side gateway that manages your authentication, session, OAuth 2.0 access tokens, and request routing. That’s what we’re going to do in this tutorial. Devs may also be worried about fighting with UI and server configuration when serving up the UI along with a backend but I’ll show you how easy it is!
This tutorial builds on the great work of others. Tania Rascia has a simple standalone CRUD front-end built with Create React App and Hooks https://github.com/taniarascia/react-hooks. I love it because it’s simple! However, as a good Java developer, we have to add TypeScript and, until I learn Styled Components, my go-to UI style is Bootstrap with Reactstrap. We also add some OpenID Connect Authentication by using some techniques by Matt Raible in Use React and Spring Boot to Build a Simple CRUD App and make the backend a Spring Cloud Gateway (Webflux) and OAuth 2.0 Client.
Generate the project
Server side
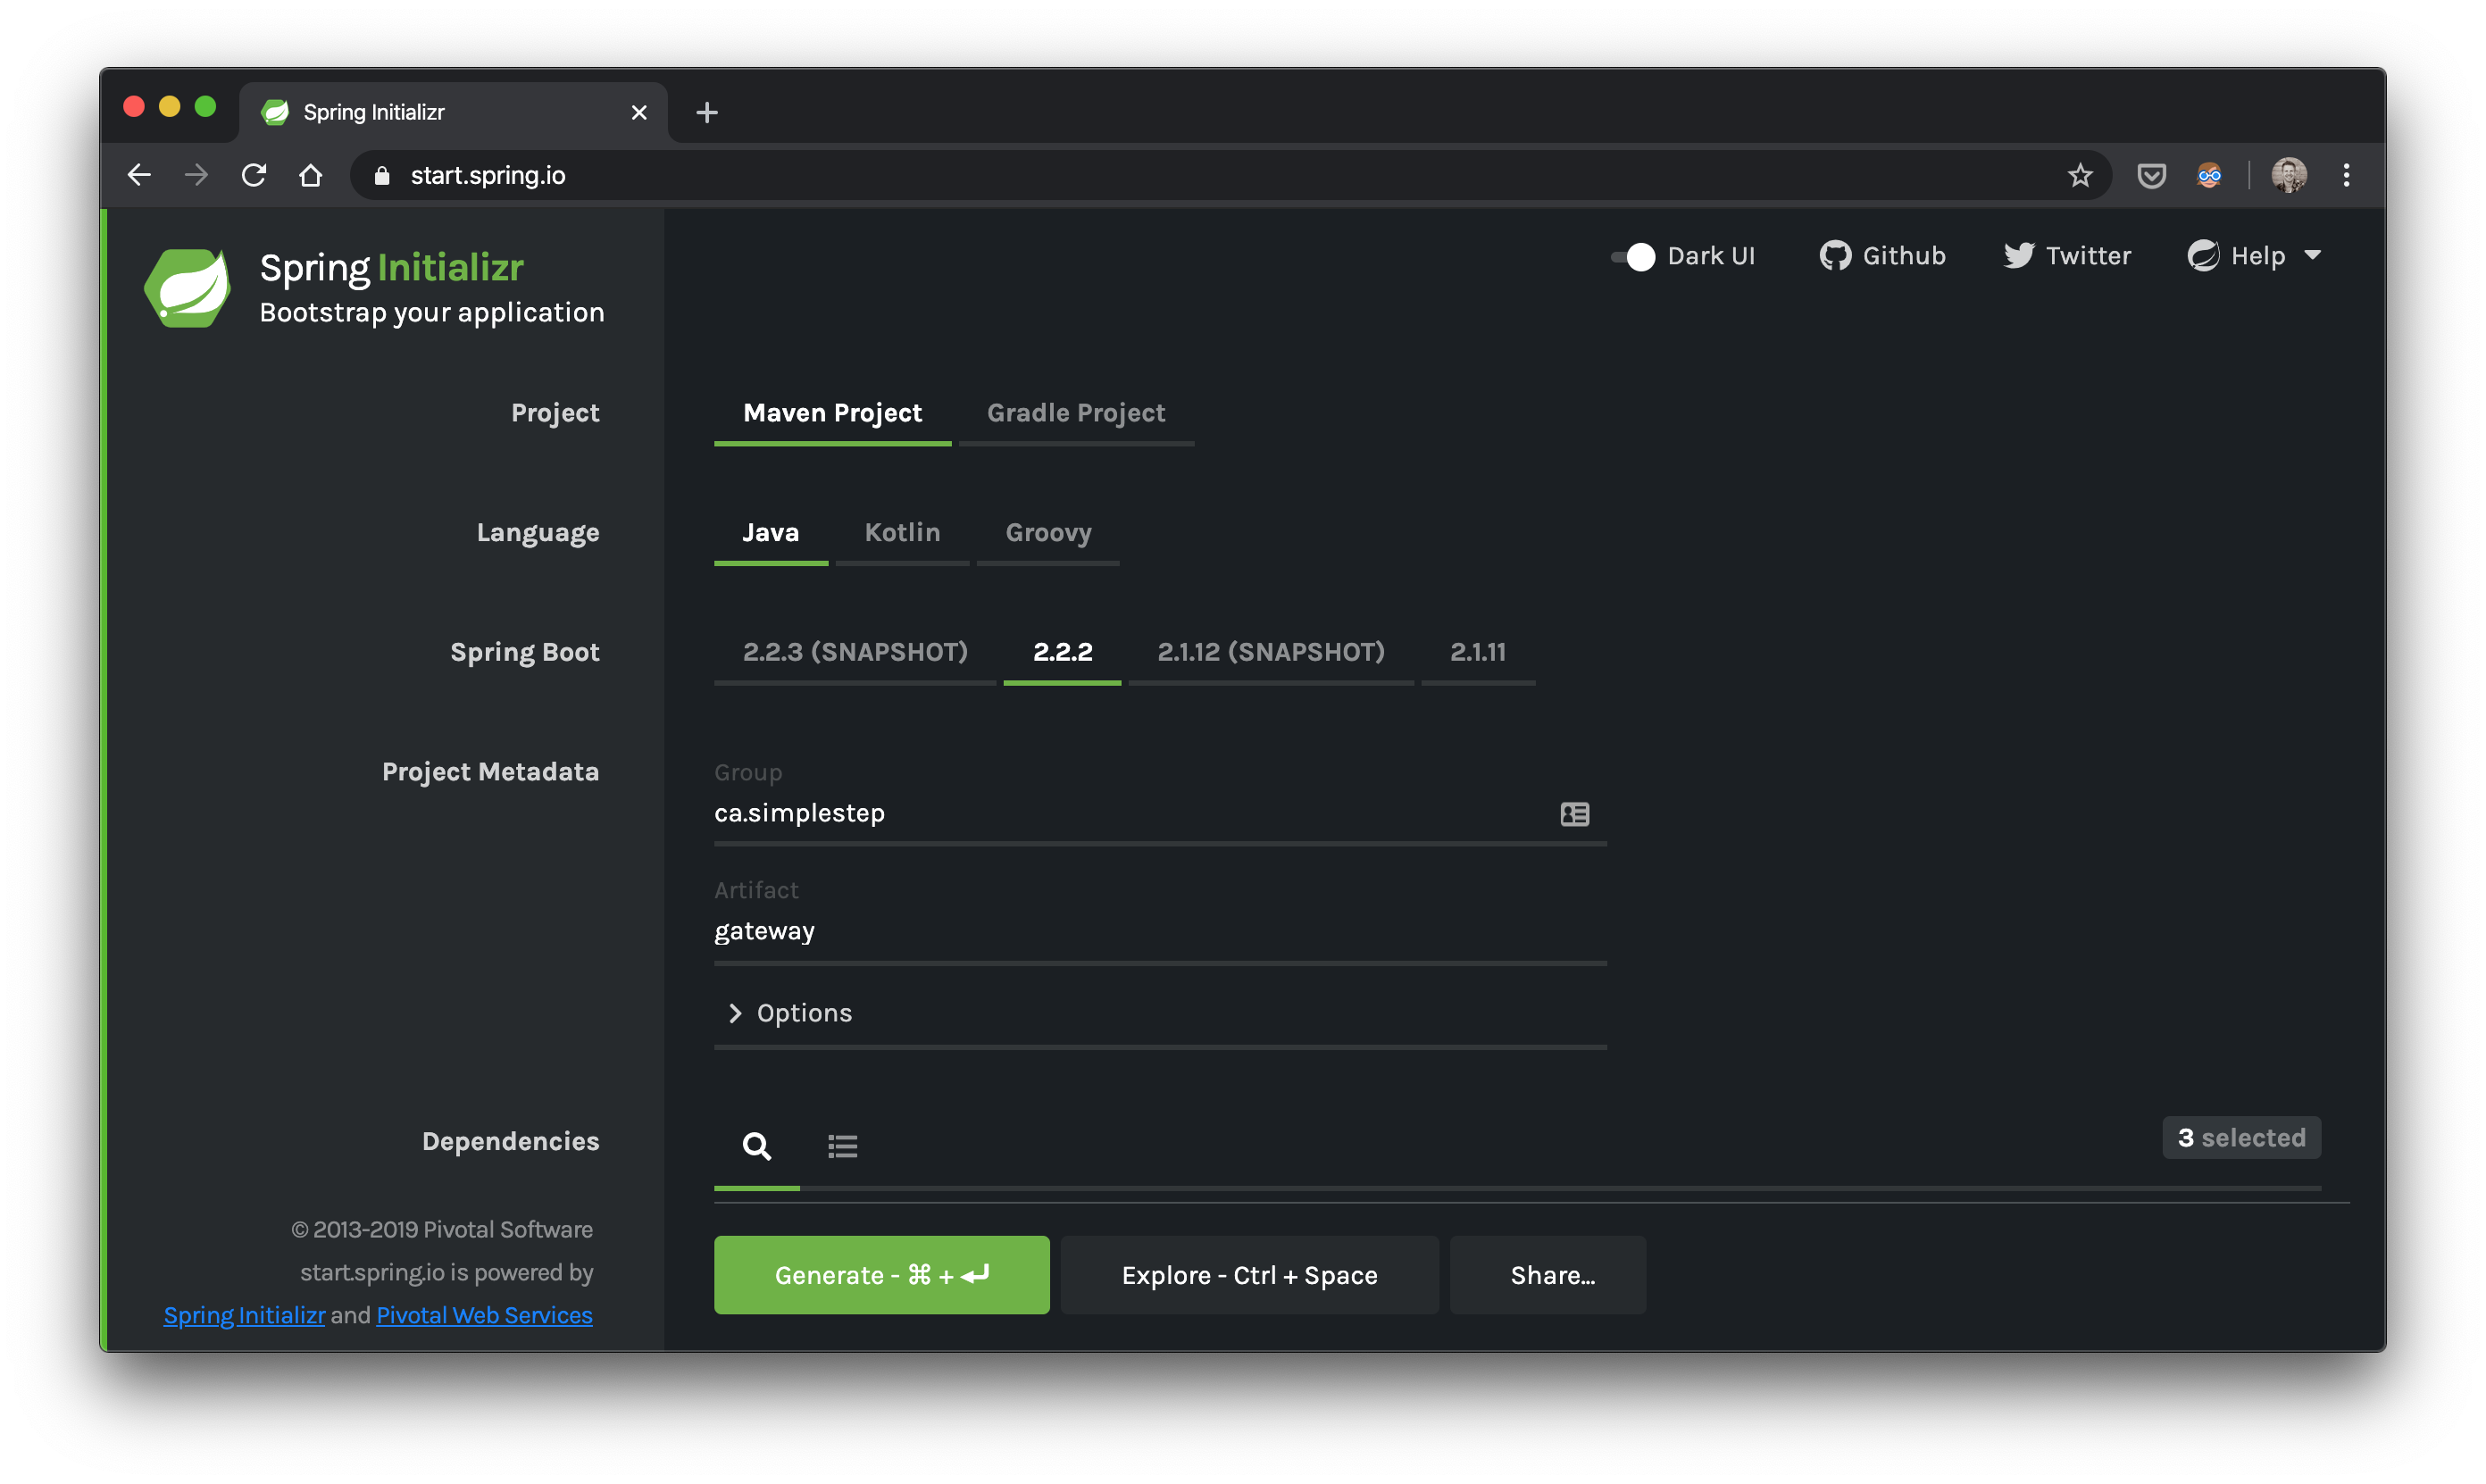
Let’s go to start.spring.io and generate our gateway.zip
Dependencies? cloud-gateway,oauth2-client,security
Front end
Make sure you have node.js installed. I’ve got v10.16.3 but the current LTS (v12.x) should work fine. My npm is 6.0.0.
Put your gateway.zip file where you want your combined UI and Gateway code to live. Then unzip it and create your react app
unzip gateway.zip && mkdir gateway/src/main && cd gateway/src/main && npx create-react-app app --template typescript && cd app && npm startWe should see a simple react app on http://localhost:3000
Add Reactrstrap dependencies
Next, add reactstrap dependencies
npm install --save bootstrap
npm install --save reactstrap react react-dom
npm install --save @types/reactstrap
The @types/reactstrap is so that TypeScript knows the types needed for Reactstrap components.
Now we can import it to our src/index.tsx
import 'bootstrap/dist/css/bootstrap.min.css';Convert CRUD app to TypeScript
I won’t go through all the details of how convert Tania Rascia’s CRUD example into TypeScript and Reactstrap, but that’s what I did.
For TypeScript, I basically, copied the .js files, converted them to .tsx, added types to make errors go away. I create a common Note.tsx that could be used to represent notes in the different files.
export interface Note {
  id: number;
  text: string;
  confidential: boolean;
}
Convert look and feel with Reactstrap
For Reactstrap, I just changed things like <input> to Reactstrap’s <Input> and so on :)
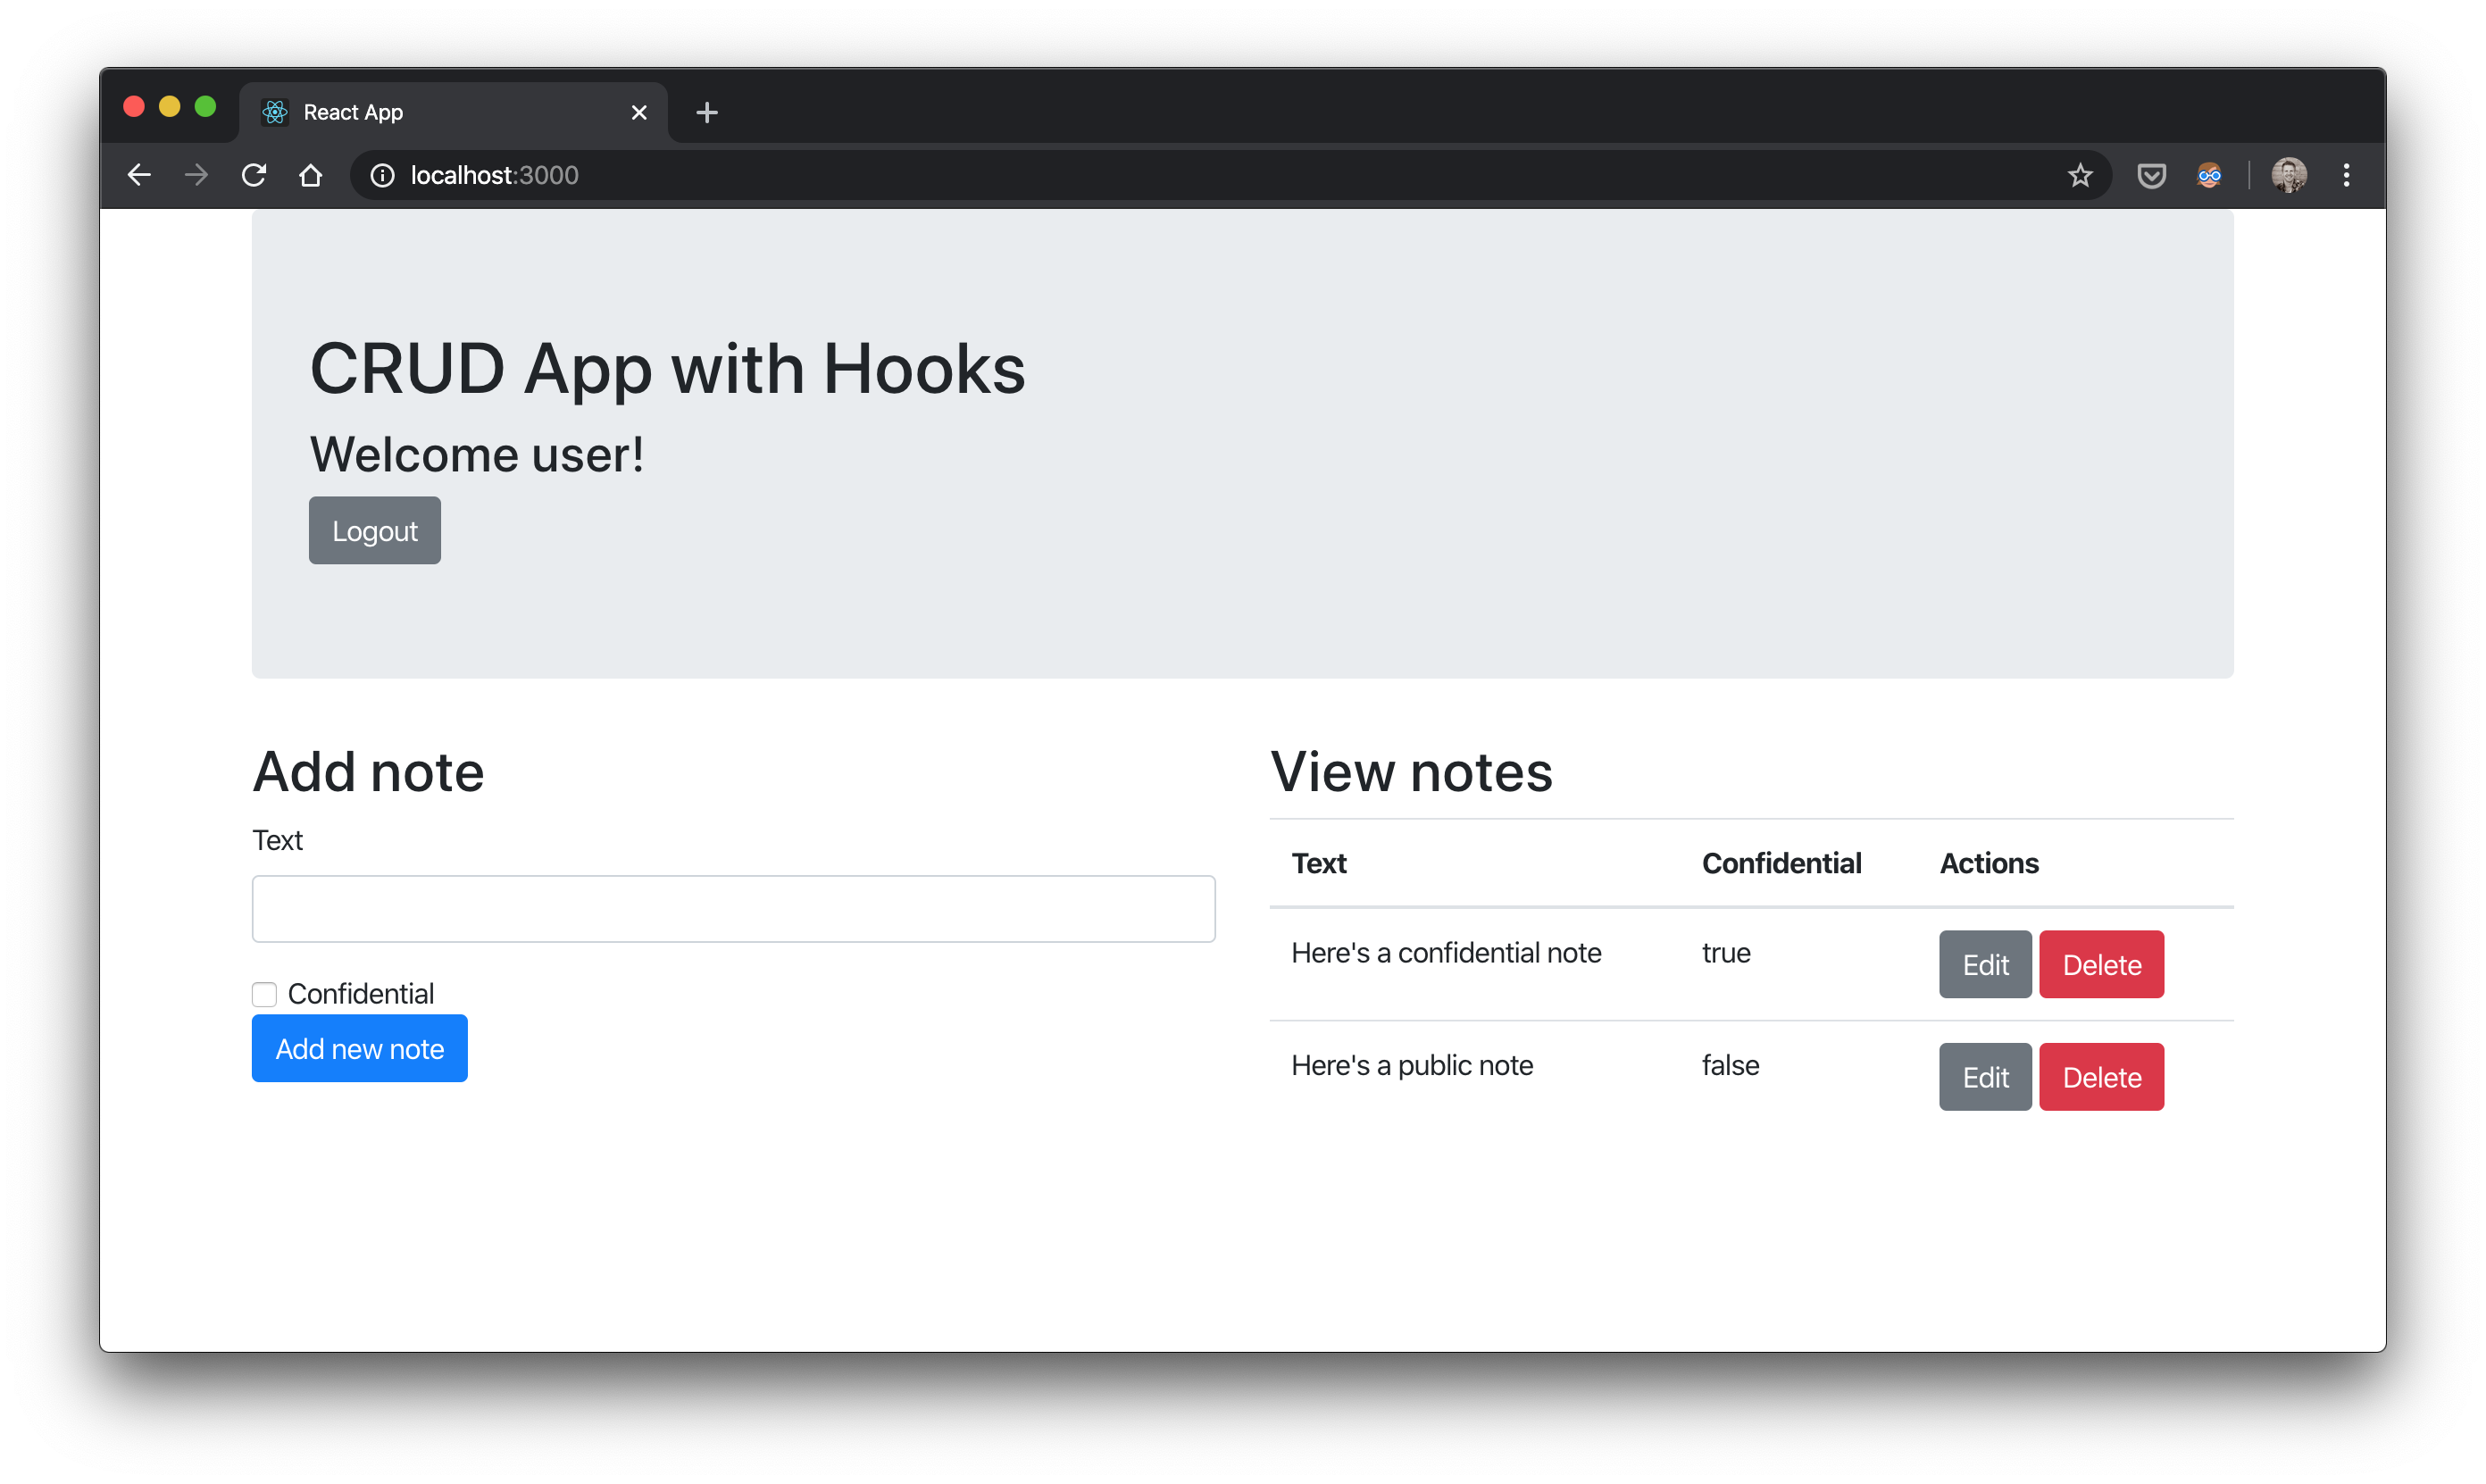
In the end I had a working CRUD app running on http://localhost:3000 but the state was all stored in the browser and, of course, there was no authentication or access tokens with which we could call a secured backend.
Authentication and Security
Front end security
At this point I leaned on Matt Raible’s React example to call a yet-to-be-implemented /api/user endpoint that returns either an empty string or the username (if authenticated) but with Hooks!
In App.tsx, I did the following:
const App = () => {
  // ...

  // Setting state
  const [ isAuthenticated, setAuthenticated ] = useState(false)
  const [ authenticatedUser, setAuthenticatedUser ] = useState('')
  const [ cookies ] = useCookies(['XSRF-TOKEN'])

  useEffect(() => {
    // Create a scoped async function in the hook
    async function runAsync() {
      try {
        const response = await fetch('/api/user');
        const body = await response.text();

        if (body === '') {
          setAuthenticated(false)
          setAuthenticatedUser('')
        } else {
          setAuthenticated(true)
          setAuthenticatedUser(body)
        }
      } catch {
        // add better error handling here
      }
    }
    // Execute the created function directly
    runAsync()
  },[])

  // ...
}
Since our /api/user call is async, we put it in an async function, runAsync, and invoke it with runAsync() after defining it. Once we get the body of our response we’ll know if we have a authenticated user or not by whether the body (i.e. the username) is an empty string or not. Depending on whether or not we have a username come back, we set the state accordingly. As for the const [ cookies ] = useCookies(['XSRF-TOKEN']), we’ll get to that in a minute :)
Next we want to hide the UI if we are not authenticated and show a login or logout button depending if the value of isAuthenticated is false or true respectively
const App = () => {
  // ...
  const login = () => {
    let port = (window.location.port ? ':' + window.location.port : '');
    window.location.href = '//' + window.location.hostname + port + '/private';
  }

  return (
    <Container>
      <Jumbotron>
        <h1>CRUD App with Hooks</h1>
        {isAuthenticated ?
        <Form action="/logout" method="POST">
          <Input type="hidden" name="_csrf" value={cookies['XSRF-TOKEN']}/>
          <h3>Welcome {authenticatedUser}!</h3><Button color="secondary">Logout</Button>
        </Form> :
        <Button onClick={login}>Login</Button>
        }
      </Jumbotron>
      {isAuthenticated &&
      <Row>
      <!-- ... -->
      </Row>
      }
    </Container>
  )
}
In the above tsx code, we define a login function that, when we click the login button, we get redirected to /private. The purpose of this is to hit a secured server-side endpoint that will force authentication with the configured Identity Provider, Keycloak in our case. For our logout button, we put it in a form that submits a POST to /logout and include a hidden input named _csrf with the value from a cookie named XSRF_TOKEN.
Back end security
We’re now getting to the point where we need to jump to the server-side to understand what’s going on.
YAML OAuth 2.0 configuration
How does Spring Security know to redirect us to Keycloak? Well, we tell set it up with an OAuth 2.0 client registration. Here’s a part of our src/main/resources/application.yml:
# ...
spring:
  security:
    oauth2:
      client:
        registration:
          login-client:
            provider: keycloak
            client-id: web_app
            client-secret: web_app
            scope: openid,profile,email
        provider:
          keycloak:
            issuer-uri: http://localhost:9080/auth/realms/jhipster
# ...
Above we define a provider that we call keycloak whose meta information (i.e. endpoints, supported features, etc.) can be found at the issuer-uri. It’s called the discovery endpoint and, once Keycloak has started up, you can check it out yourself at http://localhost:9080/auth/realms/jhipster/.well-known/openid-configuration.
In the registration section, we name our client login-client and link it to our keycloak provider. Out Keycloak realm has been pre-setup with a client that has the client id web_app and client secret web_app. Of course you’ll change the client secret in your hosted environments! Finally, we request four scopes openid,profile,email so that Keycloak will allow us to get user information and, most importantly, an id_token AND an access_token for authentication and authorization respectively.
Spring Security configuration
Once we’ve added the YAML configuration, we need to customize our SecurityWebFilterChain to cause Spring Boot’s otherwise-autoconfigured one to back off.
@EnableWebFluxSecurity
class SecurityConfiguration {

  // ...

  @Bean
  public SecurityWebFilterChain securityWebFilterChain(ServerHttpSecurity http) {
    http
        .oauth2Login(withDefaults())
        .csrf(csrf -> csrf.csrfTokenRepository(CookieServerCsrfTokenRepository.withHttpOnlyFalse()))
        .authorizeExchange(exchanges ->
            exchanges
                .pathMatchers("/manifest.json", "/*.png", "/static/**", "/api/user", "/").permitAll()
                .anyExchange().authenticated()
        )
        .logout(logout ->
            logout
                .logoutSuccessHandler(oidcLogoutSuccessHandler()));
    return http.build();
  }

  // see https://github.com/spring-projects/spring-security/issues/5766#issuecomment-564636167
  @Bean
  WebFilter addCsrfToken() {
    return (exchange, next) -> exchange
        .<Mono<CsrfToken>>getAttribute(CsrfToken.class.getName())
        .doOnSuccess(token -> {})
        .then(next.filter(exchange));
  }

  private ServerLogoutSuccessHandler oidcLogoutSuccessHandler() {
    OidcClientInitiatedServerLogoutSuccessHandler oidcLogoutSuccessHandler =
        new OidcClientInitiatedServerLogoutSuccessHandler(this.clientRegistrationRepository) {
          @Override
          public Mono<Void> onLogoutSuccess(WebFilterExchange exchange, Authentication authentication) {
            // https://stackoverflow.com/q/15988323/1098564
            // logout was called and proxied, let's default redirection to "origin"
            List<String> origin = exchange.getExchange().getRequest().getHeaders().get(HttpHeaders.ORIGIN);
            // https://stackoverflow.com/q/22397072/1098564
            setPostLogoutRedirectUri(URI.create(origin.isEmpty() || "null".equals(origin.get(0)) ?
                "http://localhost:" + serverPort :
                origin.get(0)));
            return super.onLogoutSuccess(exchange, authentication);
          }
        };
    return oidcLogoutSuccessHandler;
  }
}
There’s a fair bit going on above.
We configure our SecurityWebFilterChain with the following:
oauth2Logintells us to redirect the browser to the Keycloak’s authorization endpoint for the user to authenticate there. Before it redirects, it will save the request (e.g./private) and redirect the browser back there once the user is authenticated.- We configure
csrfwithCookieServerCsrfTokenRepository.withHttpOnlyFalse()so that the React app will be able to obtain theXSRF-TOKENthat Spring Security will return in responses so that it can send it withPOSTrequests. Note that, at least currently, we also need to create aWebFilterthat will subscribe to ourCsrfTokenso that it will be included in responses! - We configure the
authorizeExchangeto ensure all requests are made by an authenticated user except for requests to known public paths:/manifest.jsoncreated by Create React App/*.pngcreated by Create React App/static/**where we copy the build directory following annpm buildfrom Create React App/api/userwhere we return a username if the user is authenticated, and/to let theindex.htmlwith our login button display without triggering a Keycloak redirection
- Finally, we configure
logout. We’ll take the following paragraph to explain that one.
We configure logout with an OidcClientInitiatedServerLogoutSuccessHandler that knows about the Identity Provider’s end_session_endpoint and will log us out of both our gateway AND Keycloak–redirecting us back, unauthenticated, to our application’s /. Since we won’t always be on localhost, our Identity Provider usually needs to redirect us back to a different DNS name or port. When we’re running our UI with npm start, we want to be redirected back to http://localhost:3000. When we’re running in production, our application may be running on port 8080 but we’re usually behind a reverse proxy with a DNS like https://gateway.simplestep.ca that we want to be redirected back to. In both cases, there’s a proxy involved so that, by the time we get to our server-side, the request URI has changed. Fortunately, the origin http header is set with the original host where the POST to /logout was requested, letting us set that as our post_logout_redirect_uri when we’re logged out (e.g. http://localhost:3000 or https://gateway.simplestep.ca)
Proxy configuration
Honour proxy’s x-forward-* headers in webflux
Next, lets jump back to our application.yml for a second…
server:
  forward-headers-strategy: framework # https://stackoverflow.com/a/59126519/1098564 (but ours is non-servlet)
This tells Spring to look for x-forward-* headers set by the proxy to let the requests be understood on the application server as if they were made to the proxy server itself. This must be done in on your nginx or whatever proxy server you use. For local development, we also have a proxy server–a node.js express app running on http://localhost:3000. We can add in some middleware to configure it beyond the Create React App proxy defaults.
Add express proxy configuration to proxy to our gateway server
So, we install http-proxy-middleware
npm install --save http-proxy-middlewareand then we add setupProxy.js with the following content:
// https://create-react-app.dev/docs/proxying-api-requests-in-development#configuring-the-proxy-manually
// https://github.com/chimurai/http-proxy-middleware
const proxy = require('http-proxy-middleware');
module.exports = function(app) {
  app.use(
    [
        '/api',
        '/logout',
        '/private',
        '/oauth2/authorization/login-client',
        '/login/oauth2/code/login-client'
    ],
    proxy({
      target: 'http://localhost:8080',
      changeOrigin: true,
      xfwd: true,
    })
  );
};
Here we add the xfwd: true to our proxy options so that x-forward-* headers are added.
Of course, we’ll be proxying to http://localhost:8080 where our gateway server is running.
We also say that we want to proxy any requests made to the following paths to our gateway backend:
/apiso we receive requests like/api/notes/logoutso that our form post will be received/privateso that when we redirect to/privatethat Spring Security can redirect it again for authentication at the Identity Provider/oauth2/authorization/login-clientbecause Spring Security’s redirection to the Identity Provider first gets redirected here to make call the authorize endpoint for this particular client. In this case,login-client.- and finally,
/login/oauth2/code/login-clientbecause that is where the Identity Provider sends back thecodeduring the OAuth 2.0 authorization_code dance.
Start keycloak
Well, we’ve done a lot of configuration to talk to our Identity Provider so let’s start it, Keycloak, up!
docker-compose upVerify it’s running at http://localhost:9080
Set up our server-side routes
From our React UI, we redirect to /private when the login button is clicked. Of course we don’t want to end up there–we’re doing it to trigger authentication. Let’s define our routes and some handlers for those routes
@Configuration
class WebConfig implements WebFluxConfigurer {

  @Bean
  RouterFunction<ServerResponse> routerFunction(GatewayHandler gatewayHandler) {
    return route(GET("/api/user"), gatewayHandler::getCurrentUser)
        .andRoute(GET("/private"), gatewayHandler::getPrivate);
  }
}

@Component
class GatewayHandler {

  public Mono<ServerResponse> getCurrentUser(ServerRequest request) {
    return request.principal()
        .map(p -> ((OAuth2AuthenticationToken)p).getPrincipal())
        .flatMap(n -> ok().bodyValue(n.getAttribute("preferred_username")));
  }

  public Mono<ServerResponse> getPrivate(ServerRequest serverRequest) {
    return ServerResponse.temporaryRedirect(URI.create("/")).build();
  }
}
We’ve got two routes and their respective handler methods:
/api/userwhere we get the current username from the ID Token’spreferred_usernameclaim that is set in ourOAuth2AuthenticationToken, and/privatewhere we return a redirect back to our root,/because, like we said, we only did this to trigger authentication.
Ajaxify front-end CRUD
Now we’ve got a lot of pieces set up! Let’s hop back to the front-end and add some more calls to finish our CRUD functionality. Tania Rascia’s UI already defined these functions but manipulated the state in the browser. We tweak those functions to actually call backend API. Here’s a portion of App.tsx again.
const App = () => {
  // ...

  // Data
  const notesData : Note[] = []

  // Setting state
  const [ notes, setNotes ] = useState(notesData)

  // ...

  const getNotes = async () => {
    try {
      const response = await fetch('/api/notes');
      const notes = await response.json();
      setNotes(notes)
    } catch {
      // add better error handling here (e.g. 401?)
      login()
    }
  }

  // CRUD operations
  const addNote = (note: {text: string, confidential: boolean}) => {
    fetch('/api/notes', {
      method: 'POST',
      headers: {
        'Accept': 'application/json',
        'Content-Type': 'application/json',
        'X-XSRF-TOKEN': cookies['XSRF-TOKEN']
      },
      body: JSON.stringify(note),
    }).then((result) => {
      getNotes()
    })
  }

  const deleteNote = (id: number) => {
    // ...

    fetch(`/api/notes/${id}`, {
      method: 'DELETE',
      headers: {
        'Accept': 'application/json',
        'Content-Type': 'application/json',
        'X-XSRF-TOKEN': cookies['XSRF-TOKEN']
      }
    }).then(() => {
        getNotes()
    });
  }

  const updateNote = (id: number, updatedNote: Note) => {
    // ...

    fetch(`/api/notes/${id}`, {
      method: 'PUT',
      headers: {
        'Accept': 'application/json',
        'Content-Type': 'application/json',
        'X-XSRF-TOKEN': cookies['XSRF-TOKEN']
      },
      body: JSON.stringify(updatedNote),
    }).then((result) => {
      getNotes()
    })
  }

  // ...
}
We’re going to skip explaining the particular CRUD UI definitions but they can be looked up in the source on github. Rather, we show the CRUD function definitions that make the calls to our backend and the state that it modifies:
const [ notes, setNotes ] = useState(notesData)initilizes our notes withnotesData–an empty array of Note:[]getNotesis what we call to fetch all the notes and set the resulting json as the new state fornotesusingsetNotes. For now, if there’s an error, e.g. 401 unauthorized because our gateway session expired, we calllogin()to kickstart the session again by doing the OAuth 2.0 dance.addNote,updateNote, anddeleteNotelook pretty similar and are probably nothing new if you’re familiar with REST. However, let’s unpack a couple of things:- First, you’ll notice we’re including the header
X-XSRF-TOKENin these “write” operations. That’s what Spring Security expects - Second, we always call
getNotes()after the request is complete. It’s simple and not the most efficient but it makes sure that we get the latest array of notes in our state.
- First, you’ll notice we’re including the header
Relay API calls to resource servers
The main responsibility of a gateway is to route requests to downstream services. Here’s how we do that.
spring:
  # ...
  cloud:
    gateway:
      routes:
        - id: note
          uri: http://localhost:8081
          predicates:
            - Path=/api/notes/**
          filters:
            - TokenRelay=
            - RemoveRequestHeader=Cookie
We add predicates for the path /api/notes/** so that requests that match that path are sent to http:localhost:8081 using filters to
- relay the access token along with the request to the resources server (i.e.
TokenRelay), and - strip cookie headers as they are of no use to the resource server (i.e.
RemoveRequestHeader=Cookie)
Start the gateway in development mode
Assuming that your note resource server is up and running from Part 1 on port 8081 with keycloak on port 9080, from the gateway directory, you can pretty much start up the front end npm start and the gateway server /.mvnw spring-boot:run and it all should work (also assuming you’ve filled in the missing pieces from the github repo).
Get ready for production
In order to prepare this for production, we need add the frontend-maven-plugin to install node/npm and build our react app and place it into the executable Spring Boot .jar
  <!-- ... -->

  <properties>
    <!-- ... -->
    <!-- how versions were picked: https://nodejs.org/en/download/releases/ -->
    <nodeVersion>v10.17.0</nodeVersion>
    <npmVersion>6.11.3</npmVersion>
    <frontend-maven-plugin.version>1.8.0</frontend-maven-plugin.version>
  </properties>

  <!-- ... -->

  <build>
    <plugins>
      <!-- ... -->
      <plugin>
        <groupId>com.github.eirslett</groupId>
        <artifactId>frontend-maven-plugin</artifactId>
        <version>${frontend-maven-plugin.version}</version>
        <executions>
          <execution>
            <id>install node and npm</id>
            <goals>
              <goal>install-node-and-npm</goal>
            </goals>
          </execution>
          <execution>
            <id>npm install</id>
            <goals>
              <goal>npm</goal>
            </goals>
            <configuration>
              <arguments>install</arguments>
            </configuration>
          </execution>
          <execution>
            <id>npm test</id>
            <phase>test</phase>
            <goals>
              <goal>npm</goal>
            </goals>
            <configuration>
              <arguments>test</arguments>
            </configuration>
          </execution>
          <execution>
            <id>Frontend production build</id>
            <phase>prepare-package</phase>
            <goals>
              <goal>npm</goal>
            </goals>
            <configuration>
              <arguments>run build</arguments>
            </configuration>
          </execution>
        </executions>
        <configuration>
          <nodeVersion>${nodeVersion}</nodeVersion>
          <npmVersion>${npmVersion}</npmVersion>
          <installDirectory>.mvn</installDirectory>
          <workingDirectory>src/main/app</workingDirectory>
          <environmentVariables>
            <CI>true</CI>
          </environmentVariables>
        </configuration>
      </plugin>
      <plugin>
        <artifactId>maven-resources-plugin</artifactId>
        <executions>
          <execution>
            <id>Copy frontend production build to resources</id>
            <phase>prepare-package</phase>
            <goals>
              <goal>copy-resources</goal>
            </goals>
            <configuration>
              <outputDirectory>${basedir}/target/classes/static</outputDirectory>
              <resources>
                <resource>
                  <directory>src/main/app/build/</directory>
                  <filtering>false</filtering>
                </resource>
              </resources>
            </configuration>
          </execution>
        </executions>
      </plugin>
      <plugin>
        <artifactId>maven-clean-plugin</artifactId>
        <configuration>
          <filesets>
            <fileset>
              <directory>src/main/app/build</directory>
            </fileset>
          </filesets>
        </configuration>
      </plugin>
    </plugins>
  </build>
</project>
Configure maven plugins
frontend-maven-plugin
First, we set our node, npm and frontend-maven-plugin versions in the properties. Next we define our frontend-maven-plugin executions to
- install node and npm
- run
npm installon the project - bind
npm testto thetestmaven phase - bind
npm run buildto theprepare-packagemaven phase Finally, we configure frontend-maven-plugin to set the working directory tosrc/main/app(i.e. where our TypeScript lives) and set an environment variableCItotrueso that whennpm testis run, it completes and doesn’t sit in “watch” mode :)
maven-resources-plugin
Here we bind the copy-resources goal to the prepare-package maven phase to copy the results of the React build in src/main/app/build/ to ${basedir}/target/classes/static so it will be added to our .jar in the later package maven phase. Note that we’re also setting filtered to false because we don’t need to filter anything and I’ve been burnt too much by maven trying to “filter” files by processing things it shouldn’t!
maven-clean-plugin
The final plugin simply makes sure that the src/main/app/build directory where react built the production-ready JavaScript, etc. is deleted along with the usual “clean” location: target.
Add index.html to “/” mapping
Last, but not least, we need to make one last gateway server change. Currently, if you start up the production-built application (i.e. ./mvnw package), and start it up with
java -jar target/gateway-0.0.1-SNAPSHOT.jarhttp://localhost:8080 will be a blank page! That’s because Webflux (details here) currently doesn’t serve up index.html to /. So we take a suggested solution from stackoverflow in the link to mutate the request path accordingly.
@Component
class CustomWebFilter implements WebFilter {
  @Override
  public Mono<Void> filter(ServerWebExchange exchange, WebFilterChain chain) {
    if (exchange.getRequest().getURI().getPath().equals("/")) {
      return chain.filter(exchange.mutate().request(exchange.getRequest().mutate().path("/index.html").build()).build());
    }

    return chain.filter(exchange);
  }
}
Done!
Now if you build the app with ./mvnw clean package and run java -jar target/gateway-0.0.1-SNAPSHOT.jar, you’ll get the gateway running as a single artifact on http://localhost:8080, relaying requests to a note resource server at http://localhost:8081 with authenticating with and using access tokens from Keycloak running at http://localhost:9080!
I think that’s REALLY cool :)
Tip: If you go back to development mode (i.e. npm start and ./mvnw spring-boot:run) you’ll want to delete the target directory manually or by a ./mvnw clean spring-boot:run instead so that files from the production build don’t mess with your development files.
Conclusion
It’s been my pleasure to share how I added a Create React App with TypeScript and Hooks to a Spring Cloud Gateway OAuth 2.0 Client to relay secure requests to downstream resource servers. I’d love to hear what you think!
In the next post (Part 3), we’ll look into the place of a “policy service” for controlling authorization in applications based on the user’s identity and the permissions set up on the “policy service”.
Please follow me on twitter or subscribe to be updated as each part of this series comes out.
If you’d like help with any of these things, find out how what I do and how you can hire me at Simple Step Solutions